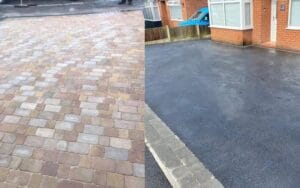
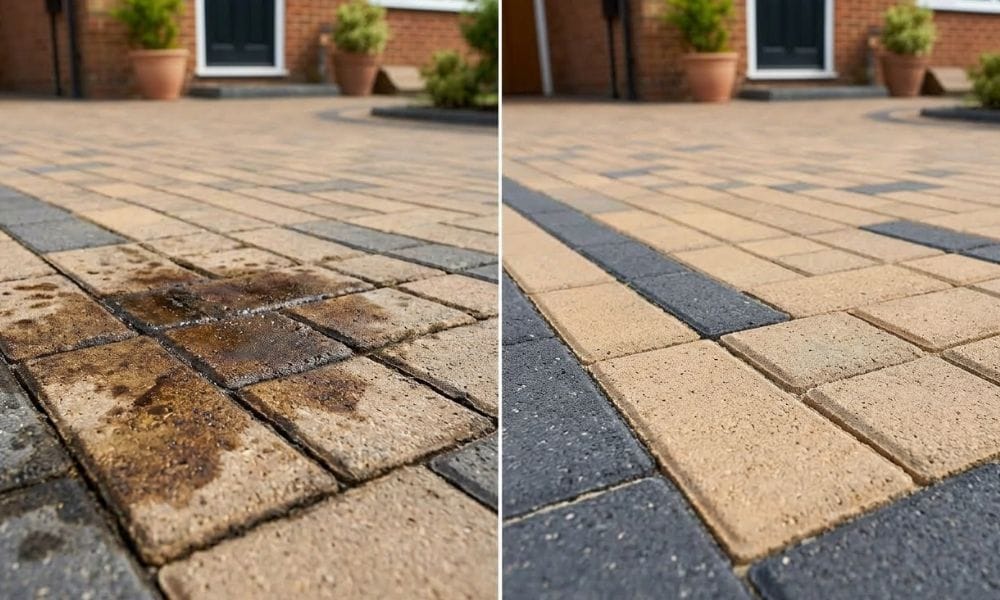
A block paved driveway is one of the most durable surfaces you can have, but it does need some attention to keep it looking its best. Moss, algae, weeds and general grime build up over time, and once they take hold they can make even a well-installed driveway look years older than it is. The good news is that most of the work is straightforward.
You don’t need specialist equipment or anything expensive from a trade supplier. If you’ve got a pressure washer, a stiff brush and an afternoon free, you can get most block paving looking close to new. For homeowners across Stoke-on-Trent, Stafford and Staffordshire who are thinking about a full replacement rather than a clean, take a look at our block paving driveways page for details on what a new installation involves.
Why Block Paving Needs Regular Cleaning
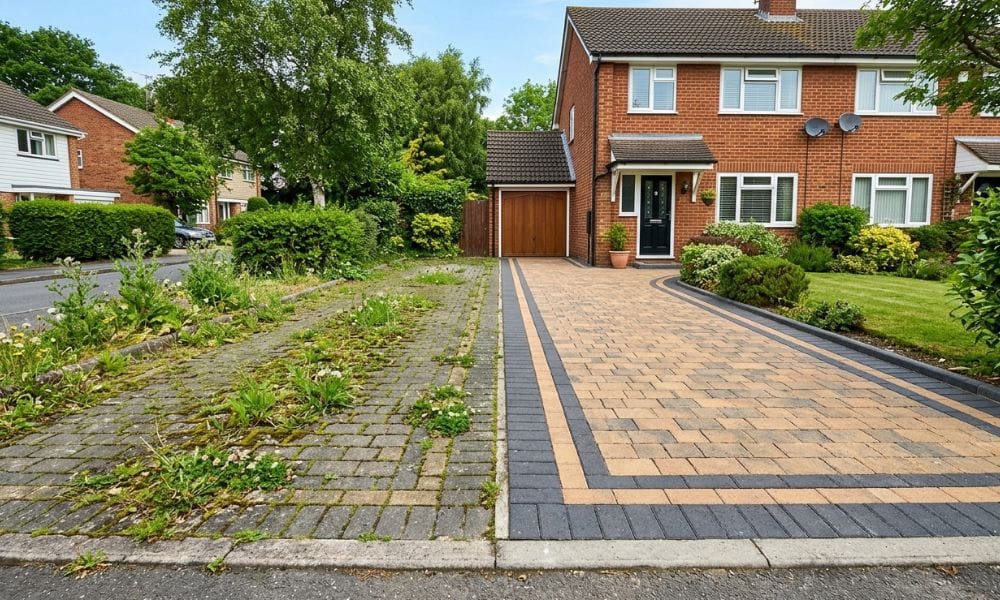
The joints between blocks are the main vulnerability. Sand sits in those gaps and over time it becomes a growing medium for weeds, moss and algae. Once growth takes hold in the joints it starts to push blocks apart, which can eventually lead to movement and unevenness.
The surface itself collects the usual mix of traffic grime, oil drips, leaf stains and algae, particularly on north-facing driveways that don’t get much sun. In wetter months the algae can build up quickly and become genuinely slippery, which is a safety issue as much as an aesthetic one.
Cleaning once or twice a year, and dealing with weeds before they get established, is enough to keep most driveways in good shape and avoid any structural problems caused by joint deterioration.
What You’ll Need Before You Start
There’s no need to buy anything specialist for a standard clean. Here’s what you’ll typically need:
- A pressure washer (1,300–1,900 PSI is plenty for block paving, going higher risks blasting out jointing sand)
- A stiff-bristled brush or yard brush
- A flat-head weeding tool or a jointing raker for the gaps
- A block paving cleaner or patio cleaner solution, available from most DIY shops for a few pounds
- A garden hose or access to water
- Kiln-dried jointing sand to refill the joints afterwards
If you don’t own a pressure washer, they’re available to hire from most tool hire shops for around £40–£60 per day. It’s worth getting one rather than trying to do the job by hand only, as it makes a significant difference to the result.
How to Clean Block Paving Step by Step
Step 1: Clear the area
Remove anything sitting on the driveway including bins, plant pots, cars. Sweep away loose leaves and debris with a stiff brush. This stops the pressure washer spreading organic matter back across the surface as you work.
Step 2: Apply a cleaning solution
For a driveway that’s mossy or heavily stained, apply a patio or block paving cleaner before you bring out the pressure washer. Mix according to the bottle instructions and apply with a watering can or garden sprayer, covering the whole surface evenly. Leave it to dwell for 15–20 minutes. This breaks down algae and makes the pressure washing significantly more effective.
Step 3: Pressure wash the surface
Work in sections, moving the lance in consistent sweeping strokes. Keep the nozzle at least 20–30cm from the surface and use a 25-degree fan tip rather than a concentrated jet. A concentrated jet at close range strips jointing sand and can chip block edges. Work from one end of the driveway to the other, letting the dirty water run off to one side rather than pushing it back across ground you’ve already cleaned.
Step 4: Rinse down
Once you’ve gone over the whole surface, give it a final rinse with clean water to clear any leftover cleaning solution. If you’re in a hard water area, which covers most of Staffordshire, a quick rinse with a hose is enough. No need to do anything further to the water itself.
Step 5: Let it dry
Block paving needs to be completely dry before you refill the joints. On a warm dry day in summer this takes a few hours. In cooler weather give it a full day if you can.
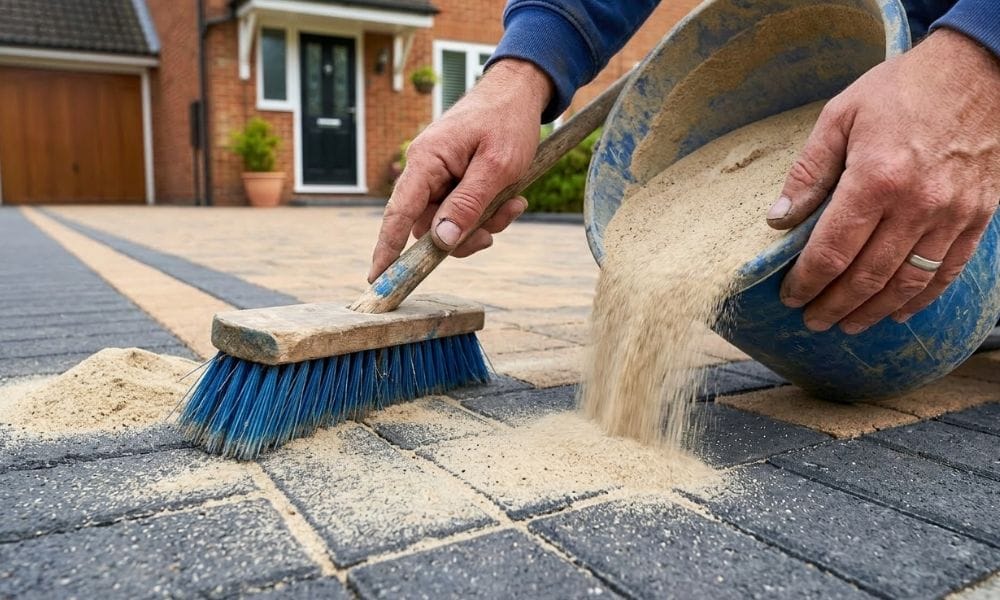
Step 6: Refill the joints with kiln-dried sand
Pressure washing removes some of the jointing sand, so this step is important and often skipped. Pour kiln-dried sand across the dry surface and brush it into the joints with a stiff broom, working it in all directions. Repeat two or three times until the joints are packed full. This re-establishes the interlock between blocks and closes up the gaps that weeds exploit.
How to Remove Weeds From Block Paving Joints
Weeds in the joints are the most common complaint with block paving, and also the most preventable. A few approaches work well depending on how established the growth is.
For light weed growth, a flat-head weeder or a jointing raker is the simplest option. Run it along the joints to pull out the roots before applying a weedkiller. If you pull without killing the root, most weeds grow back within weeks.
For more established weeds, a path weedkiller applied to dry joints and left to work over a week or two is more reliable. Avoid using bleach, it’s popular as a quick fix but it can stain lighter-coloured blocks and damage surrounding plants and grass.
Once the joints are clean and refilled with fresh kiln-dried sand, you can apply a polymeric jointing sand or a joint stabilising sealer to make the gaps much more resistant to weed regrowth. It’s not a permanent fix but it does extend the time between treatments considerably.
How to Remove Common Stains From Block Paving
Oil and grease stains
Fresh oil responds well to neat washing-up liquid or a degreaser applied directly to the stain and left for 10 minutes before scrubbing and rinsing. Old oil stains that have had time to soak in are harder. A dedicated tarmac and block paving degreaser, available from builders merchants and DIY shops, is more effective than household products for these.
Rust stains
Rust stains usually come from metal garden furniture or steel edging. A diluted solution of oxalic acid (sold as wood bleach or deck brightener) works on rust but test on a small patch first as it can lighten some block colours slightly.
Leaf and organic stains
The dark tannin stains left by wet leaves sitting on block paving respond well to a standard patio cleaner. The longer they’re left the harder they become to shift, so clearing leaves in autumn before they compact and stain is the easier approach.
Paint and sealant drips
If the paint is still wet, clean it immediately with water and a brush. Dried paint is much more of a problem. A paint stripper designed for masonry can work but carries a risk of discolouring the block surface underneath. In most cases a paint drip on a well-used driveway weathers and becomes less noticeable over time.
Should You Seal Block Paving After Cleaning?
Sealing is optional, and the arguments for and against are fairly even.
A good quality block paving sealant enhances the colour, makes the surface easier to wipe down, and slows down weed and moss regrowth in the joints. For lighter-coloured blocks, particularly buff and cream tones that show staining more readily, sealing makes a noticeable practical difference.
The downside is that sealants need reapplying every few years and can make the surface look artificially shiny if you choose the wrong product. A wet-look sealant on a traditional herringbone pattern can look a bit plastic compared to the natural matt finish of unsealed block paving.
If you do decide to seal, make sure the driveway is completely dry, ideally after a run of dry weather rather than just one dry day, and use a product specifically rated for block paving rather than a general stone sealer.
How Often Should You Clean Block Paving?
Once a year is the practical answer for most driveways in the Stoke-on-Trent, Stafford and Cheshire areas. A late spring clean gets rid of winter’s moss and algae before summer, and a quick sweep-down in autumn before the leaf fall keeps things tidy going into the wetter months.
Driveways in heavily shaded spots, or those surrounded by trees, will need more frequent attention because they stay damp longer and algae grows faster as a result. North-facing driveways in particular benefit from a treatment with an algae inhibitor once the initial clean is done.
Common Mistakes to Avoid
Using too high a pressure setting. This is the most common error. It doesn’t clean better and it strips jointing sand from the joints, which then need refilling. A moderate setting with a fan tip does the job without the damage.
Not refilling the joints. Cleaning without replacing the jointing sand leaves the surface looking clean but structurally vulnerable. Weeds establish faster in depleted joints and blocks can shift more easily.
Cleaning in the wrong conditions. Avoid cleaning in direct summer sun, the cleaning solution dries before it has time to work. Cool, overcast days are better. Also avoid cleaning before rain is forecast, as the fresh jointing sand needs time to set before it gets wet.
Leaving it too long between cleans. Block paving that’s been neglected for several years takes significantly more work to restore and sometimes doesn’t fully recover, particularly where moss has etched into lighter block surfaces. Annual maintenance is far less effort than an occasional full restoration.
Can I clean block paving without a pressure washer?
Yes, though it takes more effort. Apply a patio cleaning solution and leave it to dwell, then scrub with a stiff yard brush and rinse thoroughly with a garden hose. You won’t get the same depth of clean as a pressure washer, but for lightly soiled driveways it’s perfectly adequate. For heavy moss or algae, a pressure washer makes a significant difference and is worth hiring for the day.
Why does my block paving keep getting weeds even after cleaning?
The most likely cause is depleted jointing sand. When the joints are underfilled, they provide an easy growing medium for wind-blown seeds. Refilling with kiln-dried sand after every clean, and considering a polymeric jointing compound or joint stabiliser, will significantly reduce regrowth. A path weedkiller applied after cleaning and before refilling the joints also helps kill off any roots left behind.
How do I get rid of black spots on block paving?
Black spots on block paving are almost always lichen, a slow-growing combination of algae and fungus. They’re harder to shift than regular algae because they bond to the block surface. A dedicated lichen and algae remover, applied and left to dwell for 30 minutes before pressure washing, is the most effective approach. Repeat applications may be needed for established patches. Sealing afterwards helps prevent them coming back as quickly.
Will a pressure washer damage my block paving?
Not if used correctly. The main risk is using too high a pressure setting or holding the lance too close to the surface, which strips jointing sand from the joints and can chip block edges over time. Use a 25-degree fan tip, keep the nozzle 20–30cm from the surface, and stick to 1,300–1,900 PSI. Avoid concentrated pencil jets on the block surface entirely.
My block paving is looking very worn, is it worth cleaning or should I replace it?
If the blocks themselves are in reasonable condition but heavily stained, cleaning usually brings a significant improvement. If blocks are cracked, sunken or badly faded, or if the base has failed and sections are moving, a clean won’t address the underlying problem. At that point, replacement or at least a partial relay is worth considering. A new block paving driveway installed on a properly prepared sub-base will typically last 20 to 30 years. If you’re unsure which side of that line your driveway falls on, it’s worth getting a professional opinion before spending a day cleaning something that needs replacing.